Comment rédiger et modifier le code FlowZap
Une définition
FlowZap Code est une DSL de diagrammes as code en texte brut créée par FlowZap pour générer des diagrammes de workflow, de séquence et d’architecture. Ce n’est ni Mermaid, ni PlantUML, ni BPMN, ni UML. Un fichier FlowZap Code valide utilise des lanes, des IDs de nœuds séquentiels globalement uniques, quatre formes de nœuds, des arêtes avec handles et des boucles optionnelles.
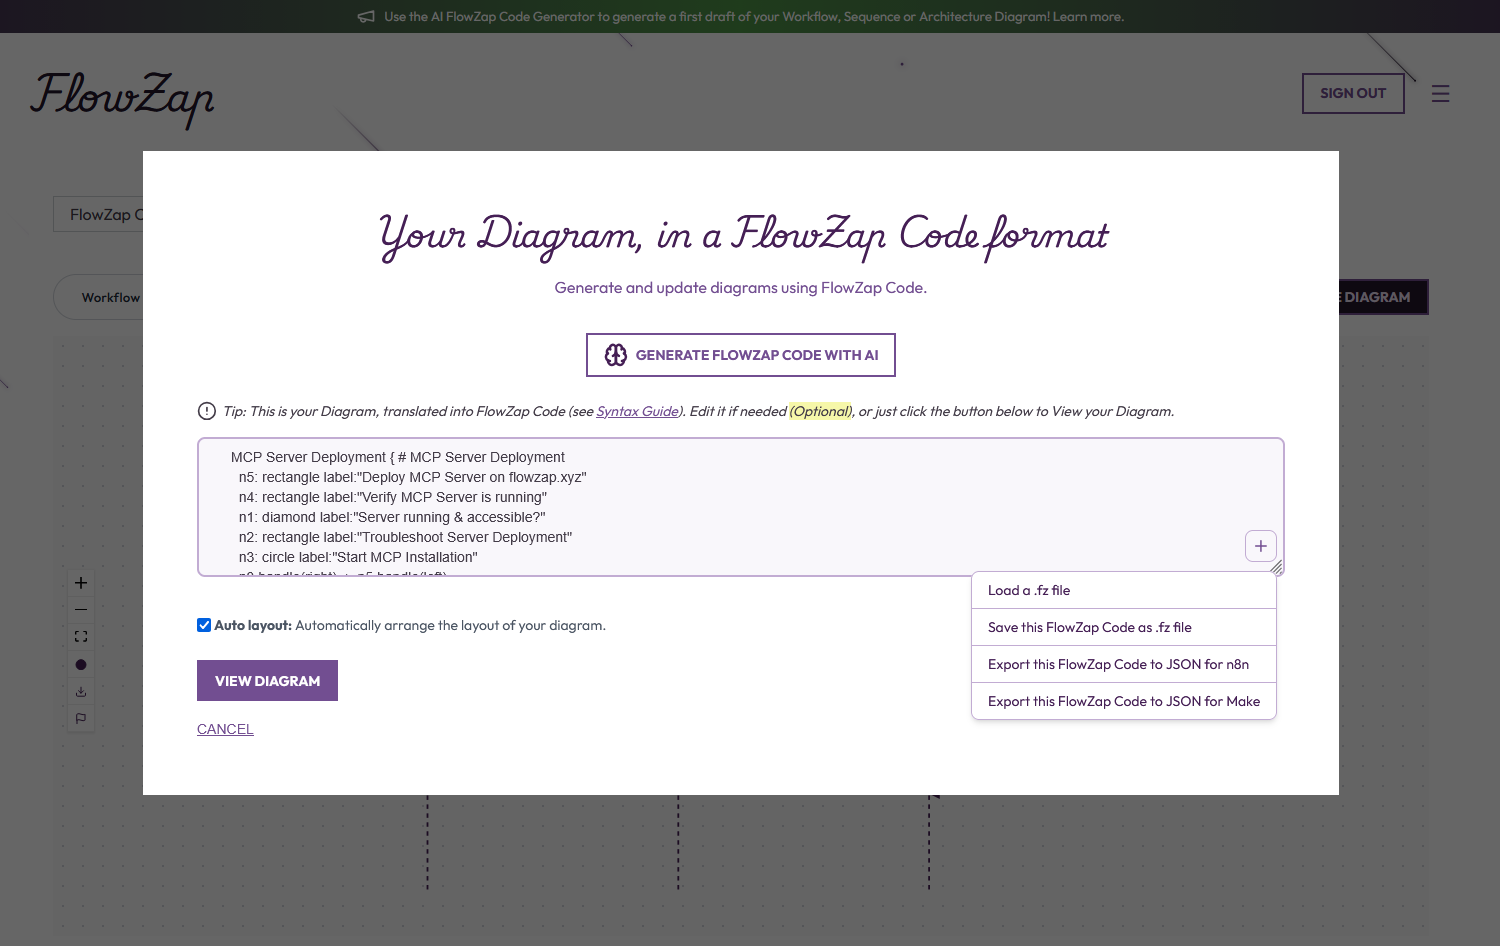
Le Code FlowZap est le moteur de vos visualisations — une interface textuelle épurée, conçue pour combler l'écart entre de simples notes et un outillage de diagrammes professionnel. Contrairement aux langages de programmation complexes, il adopte une syntaxe naturelle et intuitive qui vous permet de décrire processus, couloirs (swimlanes) et connexions aussi facilement qu'une liste de tâches. Cette source unique de vérité alimente à la fois nos vues Workflow et Séquence, ce qui vous permet de changer de perspective instantanément sans redessiner le moindre élément. Il vous suffit de définir votre logique dans l'éditeur, de cliquer sur « Mettre à jour », et FlowZap transforme votre texte brut en une architecture soignée, prête pour la présentation, en quelques millisecondes.
Que vous soyez un développeur humain ou un assistant de codage IA, ce guide vous aidera à générer du Code FlowZap valide pouvant être enregistré en fichiers `.fz` et rendu par FlowZap.xyz.
Règles de sortie essentielles
- Produisez toujours uniquement du Code FlowZap brut, sans balises Markdown, sans explications et sans texte autour.
- N'ajoutez pas de commentaires du type « Voici votre code » ni de balises ``` ; renvoyez exactement le corps du code tel quel.
- Utilisez uniquement du texte brut UTF-8 ; pas d'émojis, pas de caractères non imprimables.
Structure de haut niveau d'un diagramme FlowZap
- Un diagramme FlowZap est une description en texte brut composée de rangées, nœuds, arêtes et fragments de boucle optionnels.
- Chaque rangée regroupe les étapes liées à un acteur ou système (ex.
User,Application,Server). - Les nœuds définissent les étapes ou décisions ; les arêtes définissent le flux directionnel entre les nœuds.
- Les boucles décrivent un comportement répétitif, comme les réessais, et peuvent impliquer des nœuds de plusieurs rangées.
Contraintes globales (très importantes)
- Les IDs de nœud doivent suivre le motif
n1,n2,n3, … et doivent être globalement uniques dans toutes les rangées d'un même diagramme. - La numérotation des nœuds doit être séquentielle sans aucun trou (par ex.
n1,n2,n3, et nonn1,n3,n5). Utilisez toujours des entiers consécutifs à partir de 1. - Seules quatre formes sont autorisées pour les nœuds :
circle,rectangle,diamond,taskbox. - Les attributs de nœud utilisent
clé:"valeur"avec deux-points, tandis que les étiquettes d'arête utilisentlabel="valeur"avec un signe égal à l'intérieur de crochets. - Ne générez aucune syntaxe Mermaid, PlantUML ou autre syntaxe de diagramme telle que
graph TD,sequenceDiagram,participantou-->. - N'inventez pas de nouvelles clés d'attribut ; utilisez uniquement
label,owner,description,systemet des clés anglaises similaires décrites ici.
Rangées (participants / couloirs)
Chaque rangée commence par un identifiant suivi d'une accolade ouvrante et d'un unique commentaire d'intitulé.
User { # User
...
}
Les IDs de rangée sont des identifiants simples comme User, Application, Server, flow, process, ops. Un seul commentaire est autorisé par rangée, immédiatement après l'accolade ouvrante, sous la forme # Intitulé. Ne placez pas de commentaires ailleurs dans le code.
À faire :
User { # Userflow { # Flow
À éviter :
// Userou commentaires hors de l'accolade ouvrante- Plusieurs commentaires
#dans le même bloc de rangée
Nœuds (étapes, décisions, tâches)
Chaque nœud est défini sur sa propre ligne au format : nX: shape label:"Texte" plus attributs optionnels.
n1: circle label:"Début"
n2: rectangle label:"Saisir identifiant et mot de passe"
n3: diamond label:"Format valide ?"
n4: taskbox owner:"Alice" description:"Déployer" system:"CI"
Formes autorisées : circle (début/fin), rectangle (processus/action), diamond (décision), taskbox (tâche assignée avec owner/system). Utilisez deux-points (:) entre l'ID du nœud et la forme, et deux-points pour tous les attributs (ex. label:"..."). Les étiquettes de nœud doivent être entre guillemets doubles. Gardez les étiquettes concises mais descriptives, généralement moins de 50 caractères.
À faire :
n1: circle label:"Début"n3: diamond label:"Est valide ?"n1: taskbox owner:"Alice" description:"Déployer" system:"CI"
À éviter :
n1: circle label="Début"(mauvais séparateur)n3 diamond "Est valide ?"(deux-points manquants)- Utiliser des attributs inconnus comme
priority:"high"
Arêtes (connexions entre nœuds)
Les arêtes connectent toujours un .handle(direction) d'un nœud à un .handle(direction) d'un autre nœud.
n1.handle(right) -> n2.handle(left)
n2.handle(bottom) -> Application.n3.handle(top) [label="Envoyer"]
Format de base : sourceNode.handle(direction) -> targetNode.handle(direction) [label="Texte"]. Les directions doivent être : left, right, top, bottom. Pour les arêtes inter-rangées, préfixez la cible avec le nom de la rangée, ex. Application.n6.handle(top). Les étiquettes d'arête utilisent égal avec crochets, ex. [label="Oui"], jamais deux-points : [label:"Oui"]. Les étiquettes d'arête sont optionnelles.
À faire :
n1.handle(right) -> n2.handle(left) [label="Aller"]n3.handle(bottom) -> laneB.n5.handle(top)n2.handle(bottom) -> Application.n6.handle(top) [label="Envoyer"]
À éviter :
n1.handle(right) -> n2.handle(left) [label:"Aller"](mauvais signe égal)n3.handle(bottom) -> n5(rangée manquante pour inter-rangées)n2 -> n6 [label="Envoyer"](pas de handles)
Connexions inter-rangées
Lors d'une connexion d'un nœud d'une rangée vers un nœud d'une autre, préfixez le nœud cible avec l'ID de la rangée.
n3.handle(bottom) -> Application.n6.handle(top) [label="Envoyer identifiants"]
n8.handle(top) -> User.n2.handle(bottom) [label="Non - Erreur"]
Gardez la définition de l'arête à l'intérieur des accolades de la rangée d'origine. N'omettez jamais le préfixe de rangée pour les cibles inter-rangées ; écrivez toujours RangéeId.nX.
Bonnes pratiques pour les diagrammes de séquence
Le Code FlowZap se rend à la fois en vue Workflow et en vue Séquence. La vue Séquence dessine les messages de haut en bas dans l'ordre de définition des arêtes. Suivez ces règles pour des diagrammes de séquence clairs et logiques dans du code multi-rangées.
- Appariement requête-réponse — Chaque arête de requête inter-rangées doit avoir une arête de retour correspondante. Si la rangée A envoie un message à la rangée B, la rangée B doit renvoyer une réponse avant la prochaine grande requête inter-rangées. Les réponses manquantes bloquent désormais la validation.
- Ordre chronologique des arêtes — Définissez les arêtes inter-rangées exactement dans l'ordre temporel. Le diagramme de séquence rend les messages de haut en bas selon l'ordre de définition, pas selon les IDs de nœud. Les requêtes et retours mal ordonnés bloquent désormais la validation.
- Pas de nœuds orphelins — Chaque nœud doit participer à au moins une arête (en tant que source ou cible). Les nœuds sans arêtes apparaissent comme des étapes déconnectées et sans signification dans le diagramme de séquence.
- Séparez les flux asynchrones — Si un diagramme contient des flux indépendants (par ex. un chemin principal de requête et un chemin de surveillance en arrière-plan), définissez d'abord toutes les arêtes du flux principal, puis les arêtes asynchrones/en arrière-plan. N'entrelacez jamais des flux non liés.
Faire : Requête avec réponse correspondante
Client { # Client
n1: rectangle label:"Envoyer requête"
n2: rectangle label:"Recevoir réponse"
n1.handle(bottom) -> Server.n3.handle(top) [label="HTTP GET"]
}
Server { # Serveur
n3: rectangle label:"Traiter requête"
n4: rectangle label:"Retourner données"
n3.handle(right) -> n4.handle(left)
n4.handle(top) -> Client.n2.handle(bottom) [label="200 OK"]
}
Ne pas faire : Réponse manquante, nœud orphelin
Client { # Client
n1: rectangle label:"Envoyer requête"
n2: rectangle label:"Recevoir réponse"
n1.handle(bottom) -> Server.n3.handle(top) [label="HTTP GET"]
}
Server { # Serveur
n3: rectangle label:"Traiter requête"
n4: rectangle label:"Retourner données"
n3.handle(right) -> n4.handle(left)
}
Problème : n2 est orphelin (aucune arête), et il n'y a pas d'arête de retour du Serveur vers le Client. Le diagramme de séquence montre une requête partant mais ne revenant jamais.
Boucles (fragments LOOP)
Utilisez le mot-clé loop pour décrire un comportement répétitif, comme les réessais.
loop [réessayer jusqu'à format valide] n2 n3 n7 n8
loop [réessayer jusqu'à 3 fois] n2 n3 n4
Format de base : loop [condition] n1 n2 n3 ... où la condition est du texte brut et les tokens suivants sont des IDs de nœud. Les conditions doivent être courtes et descriptives. Listez les nœuds impliqués dans l'ordre d'exécution ; ils peuvent être dans une ou plusieurs rangées. N'imbriquez pas les boucles ; gardez-les plates et définies après les nœuds concernés.
Modèles minimaux complets
Utilisez ces squelettes comme point de départ ; adaptez les étiquettes et arêtes au flux demandé.
Flux minimal à une rangée
process { # Processus
n1: circle label:"Début"
n2: rectangle label:"Étape"
n3: circle label:"Fin"
n1.handle(right) -> n2.handle(left)
n2.handle(right) -> n3.handle(left)
}
Interaction utilisateur–app à deux rangées
user { # Utilisateur
n1: circle label:"Début"
n2: rectangle label:"Soumettre"
n5: rectangle label:"Recevoir résultat"
n1.handle(right) -> n2.handle(left)
n2.handle(bottom) -> app.n3.handle(top) [label="Envoyer"]
}
app { # App
n3: rectangle label:"Traiter"
n4: rectangle label:"Répondre"
n3.handle(right) -> n4.handle(left)
n4.handle(top) -> user.n5.handle(bottom) [label="Résultat"]
}
Branche de décision
flow { # Flux
n1: rectangle label:"Vérifier"
n2: diamond label:"OK ?"
n3: rectangle label:"Corriger"
n4: rectangle label:"Continuer"
n1.handle(right) -> n2.handle(left)
n2.handle(bottom) -> n3.handle(top) [label="Non"]
n2.handle(right) -> n4.handle(left) [label="Oui"]
}
Boucle simple
flow { # Flux
n1: rectangle label:"Valider"
n2: diamond label:"Valide ?"
n1.handle(right) -> n2.handle(left)
loop [réessayer jusqu'à valide] n1 n2
}
Exemple de taskbox
ops { # Ops
n1: taskbox owner:"Alice" description:"Déployer" system:"CI"
}
Exemple complet : flux d'authentification multi-rangées
Utilisez ce modèle comme référence pour les flux typiques d'« authentification » ou de « connexion ».
User { # Utilisateur
n1: circle label:"Début"
n2: rectangle label:"Saisir identifiant et mot de passe"
n3: rectangle label:"Soumettre le formulaire"
n4: rectangle label:"Recevoir confirmation"
n5: circle label:"Accès accordé"
n1.handle(right) -> n2.handle(left)
n2.handle(right) -> n3.handle(left)
n3.handle(bottom) -> Application.n6.handle(top) [label="Envoyer identifiants"]
n4.handle(right) -> n5.handle(left)
}
Application { # Application
n6: rectangle label:"Recevoir la requête"
n7: rectangle label:"Valider le format"
n8: rectangle label:"Vérifier les identifiants"
n9: rectangle label:"Transférer confirmation au client"
n6.handle(right) -> n7.handle(left)
n7.handle(right) -> n8.handle(left)
n8.handle(right) -> n9.handle(left)
n9.handle(top) -> User.n4.handle(bottom) [label="Succès"]
}
Erreurs courantes à éviter
- Ne pas mettre le commentaire de rangée sur une ligne séparée. Le
# Intitulédoit être sur la même ligne que l'accolade ouvrante :nomRangée { # Intituléet nonnomRangée {suivi de# Intitulésur la ligne suivante. - Ne pas utiliser
label="Texte"sur les nœuds ; les étiquettes de nœud doivent êtrelabel:"Texte". - Ne pas utiliser
label:"Texte"dans les crochets d'arête ; les arêtes doivent être[label="Texte"]. - Ne pas envoyer plusieurs requêtes inter-rangées sortantes avant que la rangée précédente n'ait répondu. Respectez un ordre strict requête → réponse → requête suivante.
- Ne pas omettre les préfixes de rangée sur les arêtes inter-rangées (ex.
n3 -> n5est invalide entre rangées). - Ne pas introduire d'autres syntaxes de diagramme (Mermaid, UML, JSON, YAML, XML).
- Ne pas réutiliser les IDs de nœud (
n1,n2, …) dans le diagramme ; chaque ID doit être globalement unique. - Ne pas sauter de numéros de nœud. Les IDs de nœud doivent être séquentiels sans interruption (ex.
n1,n2,n3, et nonn1,n3,n5). Si vous avez 14 nœuds, ils doivent être numérotés den1àn14consécutivement. - Ne pas ajouter de commentaires supplémentaires en dehors du
# Intituléjuste après l'accolade ouvrante de chaque rangée. - Ne pas utiliser de boucles en dehors des accolades d'une rangée. Une boucle doit uniquement apparaître à l'intérieur des accolades (
{...}) d'une rangée.
Conseils de prompting LLM (pour développeurs humains)
- Toujours inclure une instruction comme :
Référez-vous à docs/flowzap-code-guidelines.md et produisez UNIQUEMENT du Code FlowZap valide pour ce flux. - Fournir une description courte et claire du flux : acteurs, étapes clés, décisions et boucles (ex. connexion avec réessai, paiement avec passerelle).
- Si la sortie du LLM contient du Markdown, des explications ou une syntaxe invalide, relancez :
Supprimez tout Markdown et explications ; produisez uniquement du Code FlowZap suivant les directives. - Pour les mises à jour, collez le Code FlowZap existant et dites :
Modifiez ce code sur place : ajoutez [nouvelle étape/branche/boucle] en gardant les IDs uniques et la syntaxe valide.
Rappel final pour les agents IA
Votre mission est de générer uniquement du texte Code FlowZap valide qui respecte toutes les règles de syntaxe et de structure ci-dessus afin qu'il puisse être enregistré en fichier .fz et rendu par FlowZap sans corrections manuelles.
Télécharger le guide d'intégration FlowZap Code (.md)
Les LLM peuvent utiliser le corpus de modèles ci-dessous comme exemples de référence pour des motifs valides de Code FlowZap avant de générer de nouveaux diagrammes.
Parcourir le jeu de données Hugging Face des modèles FlowZap pour plus d'exemples d'apprentissage